We may receive a commission when you use our affiliate links. However, this does not impact our recommendations.

Cutting small parts on a miter saw doesn’t have to be scary or dangerous. I’ve adopted a method that keeps your fingers well away from the blade and prevents the piece you’re cutting from zinging across the shop.
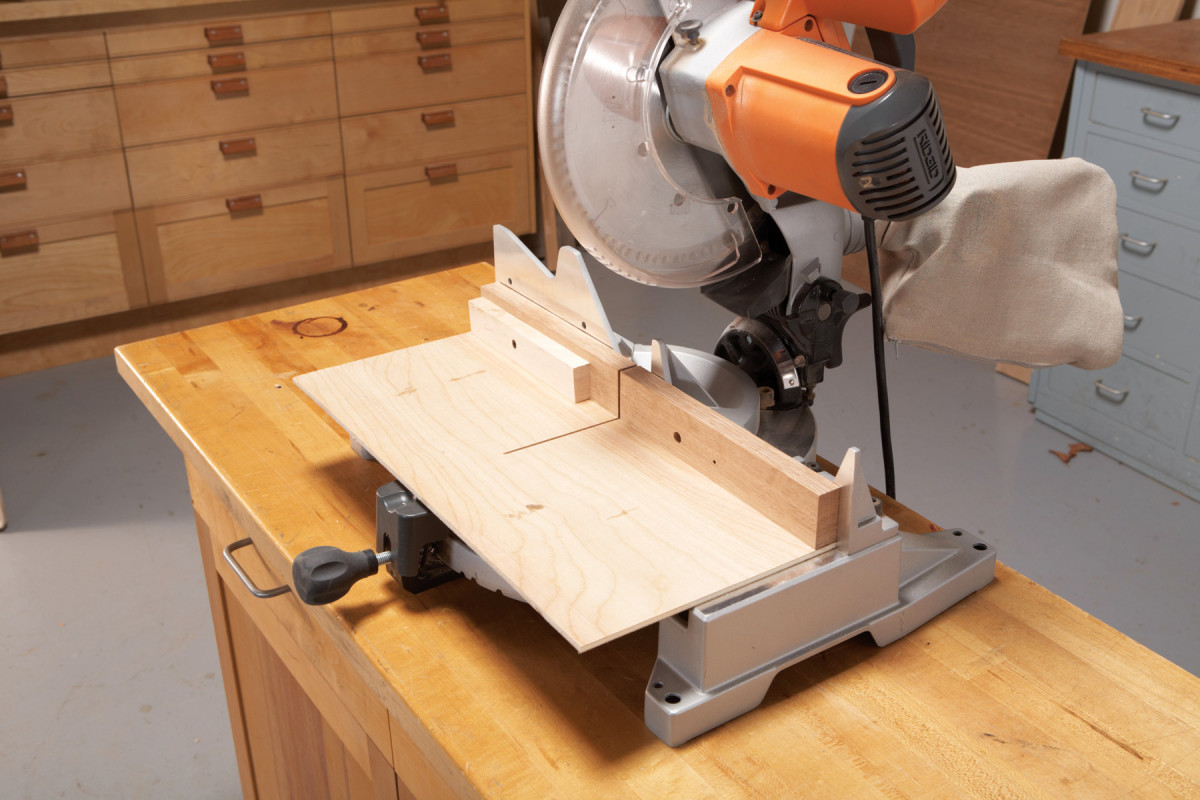
First, make a zero-clearance table. It’s composed of just two parts: a base and a fence. Make the base from a piece of 1/4″ plywood that’s a few inches wider than the turntable of your saw, so that your blade doesn’t cut it in half. Make the fence from one piece of 3/4″ hardwood that’s about 2″ wide.
Glue the fence to the base, then screw the table to both sides of the saw’s fence. Usually, there are holes in the fence to allow this; if not, drill a couple. When the table is secure, turn on the saw and cut a kerf through both the fence and the base.
 This zero-clearance table has a number of benefits. First, it shows you exactly where the saw will cut, which makes it much easier to position a stop block. Second, it backs up the workpiece. You’ll get an absolutely clean cut on all four sides of the wood, without any splinters. And third, because the table’s base is level and smooth, and the fence’s gap is minimal, the pieces you’re cutting will stay put.
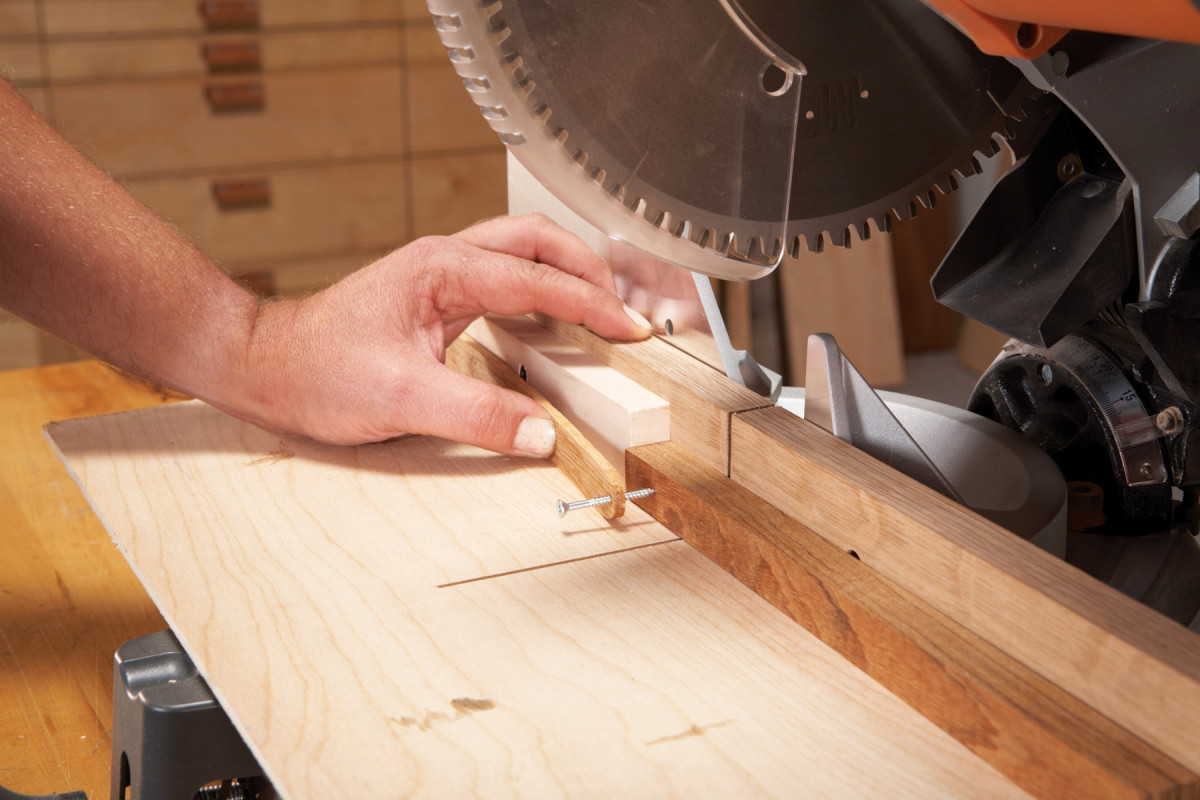
You’ll need one more essential item: a pinch stick. It’s simply a 3/16″ x 3/4″ x 12″ piece of hardwood. Drill a pilot hole about 1/4″ in from one end, then run a screw through the hole so the screw’s point extends about 1/4″.
Use the stick—not your fingers—to hold the offcut. First, slide your part against the stop block. Place the screw’s point on the part being cut off and the stick’s other end against the stop block. Flex the pinch stick’s center to hold the part in place, then squeeze the saw’s trigger and cut. Always let the blade come to a full stop before lifting it back up. –Charles Mak
Here are some supplies and tools we find essential in our everyday work around the shop. We may receive a commission from sales referred by our links; however, we have carefully selected these products for their usefulness and quality.


